Thursday, May 30, 2013

Ironing Board

Several months ago, I reorganized, cleaned, sorted, and otherwise turned my craft-room-life upside-down.  But, nothing lives in a vacuum, and as time marched on, the status quo went up and down.  I mean, I'd finish projects or, as I'd find deals on organizational items, I'd pick them up, making improvements.  (Note the wire cube shelves and a baker's rack).


But, my husband is proficient at finding stuff to put in there.  Heavens, I can't even take pictures right now because it's so messy.  Hard to prove the benefits when there's a major project strewn all over, preventing me from doing anything else, lol.

But today's topic isn't about organization (phew!), it's about an ironing board.  And here's what happened. . .  I work for (with?) a Habitat ReStore.  And they ended up with a dozen or so of these:


I instantly recognized the necessity of owning this item.  If I had had the room, I would have bought all of them, but one was all I could afford (monetary and space-wise).  And the plan was to put it where Gram's old ironing board sat.  But the ironing board was still necessary, so now what?

Then I get a brilliant idea -- I should just make a new one that fits on top of this thing.  Yeah, and then it would be bigger which would be much better than the regular one I was using.  I'm so smart!

Except that about 1,000 other women have had the same idea.  In fact, Martha Stewart has a very nice YouTube on it (which is good, since I forgot to take pictures again).  I don't know how to connect it, and I'm not sure on the legality, so I'm just going to say to go to www.marthastewart.com and search "oversized ironing board".  Since I started collecting supplies before I watched Martha's video, mine differs slightly.  BUT, there's another awesome one out there involving folding a towel in half and some padding to make a "pillowcase" for a rough piece of wood.  Also a slick idea.

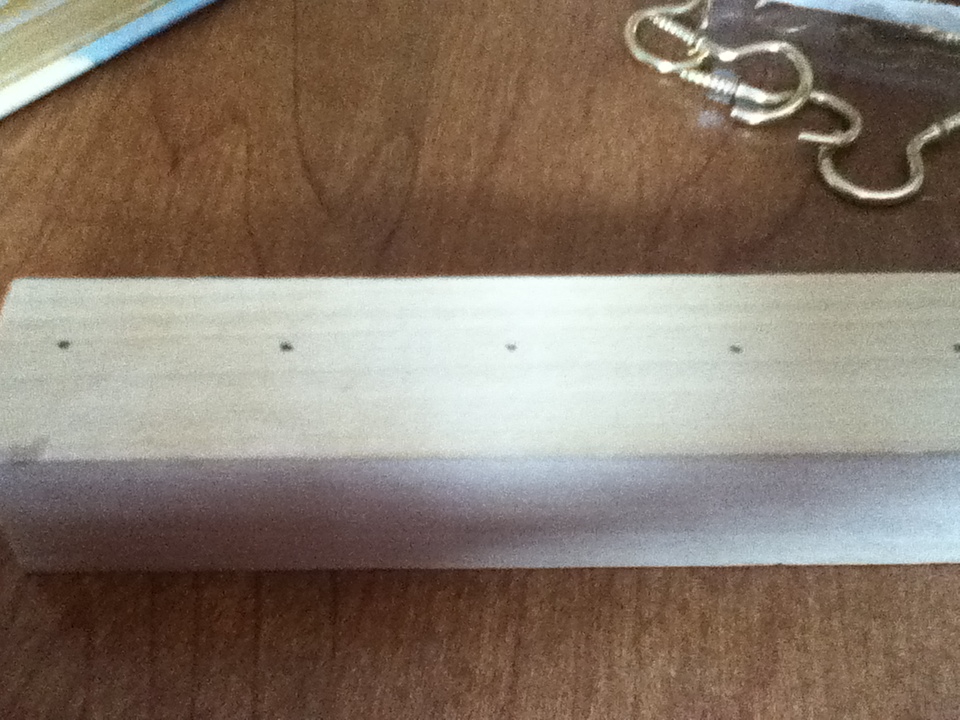
So for mine, I found a scrap piece of wood at my Habitat ReStore -- there were choices, but I picked up something like shelving material.  Then I had my father-in-law cut it to the specific dimensions of the top of my cabinet.

I purchased enough firm loft batting (not thick and not thin), to double cover one side of the board and wrap around a few inches (two layers).  Martha had access to another kind of material, but I found this to work just fine.  I laid the batting down and smoothed it out so there were no wrinkles.  I had my husband help me lay my rather large and awkward board on the center of the batting.  Then, using an electric staple-gun, I started stapling it to the back (bottom?), stretching and pulling taut as much as possible.  Move the board away to a) check for wrinkles and smoothness, and b) prepare the next layer. 

I had also purchased some silver / heat resistant material.  I asked at the fabric store, "What do I need to make my own ironing board?", and this was the only thing they knew of.  Ah well.  Again, lay it flat, working out any wrinkles, but only a single layer this time.  Carefully place the board, finished side down, and proceed to staple the silver fabric to the back, pulling up and taut.  I chose to make each layer a little bigger than the one before so that I could cover the staples before (and affix through the new material to the wood without any of the other stuff in the way).  Again, move the board away, checking for wrinkles and smoothness and clearing a space to do the final layer.

Finally, I get to the pretty stuff.  I found absolutely beautiful Christmas fabric, $2 a yard.  One of my sources recommended dark colors -- they show the wear less than light colors.  Lay the fabric, presentation side down, flat, and without wrinkles.  Lay the board top down, position it so the part that you're most interested in seeing is centered on the board.

Here, it's most important to have enough cloth to lap beyond the prior two layers (three?), because when the pretty wears out (or wears on you, lol), you can easily rip it off and replace it without having to do anything else.

One bit of advice from Martha was to "glue" a heavy duty piece of fabric over the staples to protect any tabletops you might work on -- I chose to buy ironable latch hook rug binding and I worked half of it under as I stapled the pretty piece on the back.  Again, pull up and taut as you work.  The corners are tricky, but they will be underneath, so how obsessive compulsive you are about perfect corners is entirely up to you.  Once the stapling was done, I simply folded the binding over and used my ironing board for the first time, to stick the binding over the staples.


Once done, I simply laid it on top of my cabinet.  I was thinking of putting hinges on the back side, so if I wanted a work surface, all I'd need to do is lift, but then I decided I preferred it portable.  After all, it would be easier to iron a quilt top on my dining room table than on a cabinet tucked up against a wall, right?

Here's the finished project:


Tuesday, May 28, 2013

Organizing a craft room

Next should be the ring organizer.  But, with the advent of warm weather, my iron was going to get dusted off.  Unfortunately, this means I needed an ironing board.  So, ironing board instructions first.  But why do I need an ironing board?!?  And thus I preface with some tips on reorganizing a craft room.

Close your eyes and think of a craft room -- UFO's (UnFinished Objects) and current projects (entirely different because the first is abandoned, but the second is being worked on or there is a plan for working on within the next year), and future projects jumbled together, supplies of all kinds strewn all over, books, boxes of books, mismatched furniture, several different kitty-nesty areas clearly defined, tools, cupboards and bookshelves and bags and containers littered around, a path to the most frequently used areas barely and dangerously defined. . .  Perhaps a mental image of your own craft room, past or present, comes to mind, and you sigh, both in mild frustration and a little bit in comfort and pride.  After all, this is our domain.  

But then something catalytic happens -- for me, it was my mother dying way too early (she'd been retired approximately a year and a month).  And I realized that I didn't have time to screw around with stuff I'm never going to do, or do projects that aren't really interesting to me just because they're logical, or I made a plan, or I bought something.  I don't have time to maneuver around all the excess stuff.  My prized and precious supplies were hidden away, safe but hard to get at, and useless stuff was cluttering work surfaces.  

I didn't tear into it right away, of course.  My second catalyst, my inspiration, if you will, was when I found multi-colored wire cube shelving at a garage sale.  And there was a vision, and then there was a lot of work.  Intermixed with heartbreak and more work.  


Here are the promised tips:

1). What are your real hobbies?   Not what you want to do someday, not what you did 20 years ago, but what you do now.  Everything else goes!  Okey, okey, you can keep your Grandma's hand-held loom that she taught you on (I did), but, for goodness sakes, get rid of the wood burning kit that's taken up the corner for 4 years!

2).  If you haven't used it in years, give it up.

3). If you had forgotten you had it, give it up.  You'll just forget again, anyway.  

4). Even if you have serious plans to do something with it, if it is inexpensive, give it up.  More than likely, you'll want updated materials anyway.  

5). Decide what is staying, prioritize by wish and size, then make a schematic.  I used graph paper, some rough measuring, and crayons to work with.  I cut out shapes and moved them around to find what was pleasing and sensible.  What gets used most should be easily accessible.  What gets used in conjunction together should be close together (for instance, quilting cutting area should be near the ironing area which should be near the sewing machine).  Remember to make a piece for yourself.  You don't want to make anything too narrow to fit through.  Have friends play with the pieces, too.  You'd be surprised at how narrow minded you can become. 

6). Get help.  Yes, yes, no one else can make these decisions for you, but, once you make the decisions. . .  And they can clean.  And they can encourage you.  And they can keep you from backing out or procrastinating.  And they may take your stuff home -- then you can store it off site and still use it ;).  

7). Make four piles outside of the room (and assign someone to them :) ).  A pile to pitch.  A pile to donate / give away.  A pile to put away. A pile to put back.  If it's a multi-stage / day project, set a goal (tabletop or bookshelf or corner or whatever) or a time limit and leave 15 minutes to help deal with the piles. 

So I did just that, and was so relieved to get it back on track!  Now, if someone could give me hints on how to keep it on track!

To end, everything was peachy, then I switched my old-fashioned ironing board out for the ultimate cool cabinet, needing an ironing board top.  But more on that in the next blog.  

Monday, May 27, 2013

Bracelet Organizer

So, in my last blog, I talked about Easter and The Discussion (my husband wanted my jewelry / hair accessories cleaned up for Easter, which didn't happen, but now we're trying to avoid it for next year).  And I showed how I made a necklace organizer.  This time, it's bracelets, and I drafted both my father and father-in-law, as well as my husband.  I like to keep 'em busy, see?

Now, the problem with bracelets is 1) they come in a larger variety of sizes, shapes, rigidity, open and closed, and 2) I have far more of them, lol.  But I started the same way -- I went to Pinterest for solutions.  Unfortunately, I didn't see a lot there for what I wanted to do.  Again, I wanted something I could close.  And, of course, I had already bought three of the fake "books" from Michael's (one for the necklaces, one for bracelets, and one for rings).  So I modified my necklace book idea to try to suit the bracelets.  I made far more mistakes -- I forgot to take pictures of the actual construction, I put in too many hooks and knobs, and too many layers.  Nothing disastrous, but others can learn from my mistakes.

Materials:
  • 2 boards @ 1/2" thick (see below for specifications on the rest of the sizing)
  • Pretty paper to cover the board and strips
  • Rubber cement
  • Fake book (or other type of box)
  • 4+ screws to attach strips to front of the book (a smidge shorter than the book cover + the strip depth) -- we used #6's
  • 6+ knobs with screws
  • 10+ screw hooks
  • 2 long screws (to affix to the wall)
  • Scrap piece of wood (to affix to the wall)

For the supplies, you'll need 2 boards 1/2" thick, one the same approximate size as the fake book, the other will need to be long enough to cut two strips, about 1-1/2" wide, and long enough to fit into the inside of the box.  I went to my local Habitat ReStore (since I work on the other side of the door from it) and picked up two leftover shelving pieces.  I also picked up a variety of drawer knobs and their matching screws.  I did the measuring, but it was my father-in-law that cut the strips for me.


The purpose of the book-sized board is to give the knob screws something for stability.  The book back isn't thick enough.  And if what you end up with is thicker or thinner than the 1/2", it's cheap enough to buy more screws that are the right length at the hardware store (or even, maybe, in the Habitat ReStore).  But since the edge of this has to be presentation level, I picked up some pretty paper from Jo-Ann's Fabrics and "wrapped" the board in it.  I had to do both sides since it didn't go around all the way.  I picked worded paper, in blue, to give the feel of a "book", and the words were travel-oriented, matching the book's theme, but if you chose a different type of box, it may make sense to match the surrounding decor, or the box, or whatever catches your fancy.  Similarly, the strips that went inside matched the inside of the books decor, hence the marbled blue paper.

To "wrap" the boards, I used pencil and ruler and a ceramic cutting tool (lightly to score instead of cut) and rubber cement, but, really, I was over-engineering and it didn't hold up to the stress of adding the knobs.  In the end, I needed to electric-staple-gun some of the edges down.  Obviously, I did this on the parts that were going to be buried against the wall or the book.  I'm including pictures, but whatever makes sense to you may be better than these ideas:


Sigh -- this is where I run out of pictures.  Sorry!  And the next bit is where I suckered my Dad into helping. . .

The next step is to attach the strips to the front cover.  I did three, but now I know that the 3rd is too low (the book won't close properly with bracelets on the hooks), and you can see that the bracelets overlap quite a bit.  I'd recommend just the two (unless you got a bigger book), and space them further apart. 


I'm using a picture from the necklace organizer blog, but the idea is the same, though I did the bracelet organizer on my Dad's picnic table and with and electric drill with a screwdriver bit.  Something to note is that, as stated in a prior blog, the electric drill is a powerful creature that knows not it's own strength -- it tends to eat up the fake book.  The hand-screw-in method turned out prettier, but was a lot of work.  Kind of depends on personal preference.


Place the strips where you want them to go, making sure that you can close the book.  Clamp in place and make two guide holes (smaller than the screws)Then, simply screw the screws in.  Repeat, approximately middle of the book down for the second strip.

I had gotten gold screws, and I didn't want them too short, but my Dad did NOT like them sticking out of the strip board, so we made a trip into the hardware store to get shorter, fatter (#6) screws.  Then I asked if they had them in gold, but when we got home, we found that the guy had sold us straight screws (vs. Phillips-head, or whatever) and you can't use the electric drill with straight head because the drill tends to skip off and mar the surface of what you're working on.  There was a little bit of colorful language, lol.  And it was ok to go to town because we stopped and picked up Dad's significant other and I think we had her in stitches as she watched us work.

I think we added the hooks next, and, another mistake -- I put them too close.  Luckily, Dad asked if we could space them further apart, and I'm glad, because bracelets bow out to the sides more than my necklaces do.  They need the extra space.  Place the first one at least 3/4" in (from the outside edge), and at least 1-1/2" spacing across.  I just made little marks (attempting and somewhat failing to keep a straight line across), then my dad used a special bit to screw them in with his electric drill, "Picked these bits up years ago, and I've never gotten to use them yet!"  I was glad to oblige.  Again, the picture is from the necklace blog, but gives an idea.


For the knobs on the inside, I made marks on the inside for where I wanted the screws to go.  Then we lined the fake book and the board up together, then drilled the holes straight down through.  Finally, we flipped the book up on it's end and Dad drilled the screw in from the backside (through the board) and I held the knob in place.


Next mistake -- I had 12 knobs, so I made them fit in the book, but they were so close together, it was hard to get the bracelets in between, and it was hard to see which bracelets were which.  After all was said and done, I took every other one out in a staggered fashion.  I could see, though, that maybe you could get three across the top, two staggered a bit further down, and three more on the 3rd level?  Again, all of this depends on the box that you're using.

Finally, while the drill was still out, I had Dad put two guide holes in to affix to the wall.

So I leave my Dad's house and come home.  Now it's Ken's turn -- he has to do the affixing.  This particular book is placed right where the cabinet divides into a top and bottom section, so I used that divider (shelf?  base?) to be the stabilizing force to hold the book in place (the cabinet walls are too thin, they'd eventually break down or something -- my husband tends to over-engineer, did I say that already?).  Ken started the screws through book and board.  Then, we simply put the book against the wall, eyeballed the guide holes in reference to the shelf, then hand-screwed the screws through.  And missed the shelf, but the shelf had a stabilizing piece underneath, so that worked too.  Except that the screws were longer than that, so we needed to put a scrappy piece of wood in, anyway.  Sigh.

Finalized project -- It's taken me FOREVER to make this blog, because, 1)  I've been busy, and 2)  I didn't like the end result.  I couldn't close the book, the bracelets looked messy, I didn't like how they all went in, and some of them just wouldn't fit!  Finally, I realized that I was trying to make this poor project do too much.  The concept was phenomenal, but I need to space it all out a bit more.  So I took out half the knobs (I just unscrewed them), and I didn't use the bottom strip of hooks, or the far outside hooks, and then I took out the ones that are too big.  I'm not sure yet what I'm going to do with the too-big's, and the left-overs, but that can be another project.  Maybe another book, but with a dowel run through it (since the too-bigs are all open on one side?  Or give up on the book-on-a-wall because they're too-big and get a bracelet tree?  (After all, these tend to be my favorite bracelets)  We'll see.

But, once I did the small modifications, I came up with something that I really like and makes sense in my life.  Hope this helps inspire your creativity!


  .

Wednesday, May 1, 2013

Necklace organizer

Easter came around to my house with, well, a certain amount of stress.  See, my mother-in-law and my sister-in-law fight over which one gets Thanksgiving and/or Christmas.  That is, they both want to hold the family time at their own home.  I am more than happy to let them duke it out and tell me what I need to do and bring.  But that means that I get Easter.  And this, too, works out fine for me, since I generally am in my slow time at work and have vacation, etc.

The problem comes in because my husband goes CRAZY.  Mostly, I just hide at work and let him get on with the fanatic spring cleaning and fixing and whatever else he feels is necessary, but there's only so much of that that I can get away with.  Hard to have sympathy for a woman that has a husband that will spring clean, isn't it?  Yeah, yeah, yeah. . .

And, the annual DISCUSSION came up again.  Let me see if I can't get a picture for you:


See, I have a designated place for my woman stuff.  Which I rarely use, sigh.  But I don't want to get rid of my precious stuff, see?  Now, I took this picture today, which means this is BETTER than it was for Easter.

Anyway, the DISCUSSION.  Early in the week preceding Easter, we have a discussion on my area.  But since we have this discussion every year, I decided this year that we would survive Easter and really FIX it. 

Obviously, we DID survive Easter with a little judicious flinging of blankets.  But, true to my word, I also started investigating a solution.

And the problem lies in the fact that there are so many elements.  So I decided to tackle one of the messiest (and most dangerous to my stuff) -- the necklaces.

PInterest to the rescue!  I typed in "necklace storage" and got a LOT of hits.  The problem with most of them is that they took up so much space with very little value and even less sustainability.  You could get something artistic, but once you started using your necklaces, are you really going to replace them just so?  But one hit was perfect -- an artists case, stripped of supplies, with screws and stuff, pretty paper backing the insides, and something decorative on the outside, and HUNG ON THE WALL.  And so I hit the craft stores (we have 3 big-box types within a mile of my work).  But, unless I wanted to pay a LOT of money for an artists' case, I seemed to be out of luck.

So, first lesson -- be prepared to improvise.  I had an idea that maybe I would use a basket instead, maybe, maybe?  But the aisle before the basket (in Michael's), was a faux-book box aisle.  Pretty boxes that look like books, in all kinds of sizes.  My bathroom is supposed to be nautical themed, and I felt lucky to find that the books were in a travel theme.  Good enough for me.

I picked up 3 boxes (and should've waited and gone back 3 times with 40% off coupons, but didn't, bah) with the intent to have a necklace box (big to let the necklaces hang down), a bracelet box (medium size because I'm a bracelet girl), and little to handle the rings.


I grabbed some scrap bits of wood from the husband's stash, had the neighbor (or work friend or father (in-law) cut them to fit inside the book, and screwed one into the top cover.  I used gold #4 @ 3/4" screws, but the heads literally broke off -- I would suggest #6 instead.  And the length of the screw is dependent on the depth of the box and the scrap of wood.  I'm afraid that the whole process is so much easier with a hand drill, preferably with special bits and screwdriver heads and all that kind of stuff.  But you'll notice that we still did some of it manually.  But pilot holes (drilling a slightly smaller hole before placing a screw) is mandatory.  Also, be careful where you place the piece of wood -- you need to be able to close the cover!  Here we did two to hold the cover-side holder in place:


Now, mark  how far apart you want the hooks to be.  I think I used one inch, but left 1/2" on the side margins.  Do this with the inside bit and the one already affixed to the cover.


Drill pilot holes for the hooks -- try to NOT drill all the way through to the cover of the one already attached -- the drill is a powerful creature and knows not it's strength (and will rip up the pretty cover, given half a chance).


As you can see, we used other scrappy bits to provide stability when doing the cover.


Add your hooks.  Again, I picked gold, but whatever you want. . .  And, this is the finger-breaking task.  We DID do these with our fingers (though towards the end, I figured out how to use a shorter shanked screwdriver to leverage on the turns), but there is actually a special bit that you can buy.  Again, though, the drill is a mighty monster and will push through the paper.


Now, the next step was a MISTAKE FOR ME.  It all depends on the scrappy wood bits, and the hooks and the depth of the books.  But it may work for your project.  The problem is that the hooks wouldn't let cover close.  See below.


So we twisted it so the inside hooks hang down.   Put in some pilot holes to attach it to a wall.


Start the screws so you have less work on the vertical.


Place on the wall where you want it to go and start screwing through the wall.


If it's a thin cupboard wall, you will want to secure it on the other side with another scrappy piece of wood.


 This is what it looks like from the side.


And this is what the final project looks like, open and closed: